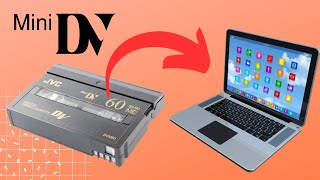
Why Digitize Mini DV Tapes
Mini DV tapes were the standard for consumer camcorders in the late 1990s and early 2000s. While they captured memorable moments in high‑definition video, the magnetic media degrades over time. Dust, humidity, and repeated playback can cause dropouts, color shifts, or complete loss of the recorded material. Digitizing Mini DV tapes preserves those memories on modern storage, makes them easy to share, and protects them from the inevitable wear of analog media.
Understanding Mini DV
Mini DV uses a 6.35 mm cassette that records digital video at 25 Mbps (standard definition) or 50 Mbps (high‑definition) depending on the camcorder model. The format stores video in a compressed MPEG‑2 or DV stream, which can be read directly by most capture devices without additional decoding. Knowing the tape’s resolution and frame rate helps you choose the right capture settings and ensures the final file matches the original quality.
Preparing Your Workspace
Before you begin, create a clean, static‑free environment. A flat table with good lighting reduces the chance of dust entering the tape path. Keep the camcorder, capture device, and computer within arm’s reach, and have a spare power outlet nearby. This setup minimizes interruptions and protects both the tape and the equipment.
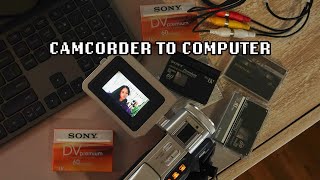
Gathering the Right Gear
- Mini DV camcorder or tape deck – the device that can play the tape.
- Video capture interface – a USB‑3.0 or Thunderbolt capture card that accepts DV or HDMI output.
- Computer with sufficient storage – at least 100 GB free for a few hours of footage.
- Capture software – free options like OBS Studio, or manufacturer‑provided utilities.
- High‑speed USB or Thunderbolt cable – ensures smooth data transfer.
Step‑by‑Step Transfer Process
Following a consistent workflow reduces errors and yields reliable results. Below is a practical sequence that works for most home users.
Connecting the Camcorder
- Power on the camcorder and insert the Mini DV tape you wish to digitize.
- Locate the video output port. Most Mini DV camcorders provide a mini‑DV (FireWire) port, but many also have HDMI or composite outputs.
- Connect the appropriate cable to the capture device. For FireWire, use a 4‑pin to 9‑pin adapter if needed; for HDMI, plug the HDMI cable directly into the capture card’s input.
Choosing Capture Software
Open your chosen capture program and select the connected device as the video source. Verify that the software detects the correct resolution (usually 720 × 480 for NTSC or 720 × 576 for PAL) and frame rate (29.97 fps or 25 fps). If the camcorder offers both DV and HDMI outputs, prefer the DV signal because it provides a lossless digital stream.
Setting Capture Settings
Configure the following parameters before you start recording:
- Format – Save the file as an uncompressed AVI or a high‑quality MOV to preserve detail.
- Codec – If you need smaller files, choose a lossless codec such as Apple ProRes or Avid DNxHD.
- Audio – Record at 48 kHz, 16‑bit stereo, which matches the original Mini DV audio.
- File naming – Use a consistent naming scheme (e.g., Event_YYYYMMDD_Part01) to keep files organized.
Running the Transfer
- Press “Play” on the camcorder and “Record” in the capture software simultaneously.
- Monitor the capture progress. Most software displays a timecode that should match the tape’s playback duration.
- When the tape reaches the end, stop the recording and save the file.
- Rewind the tape and repeat the process for any additional segments.
After the Transfer
Once the digital files are on your computer, take a few minutes to verify their integrity. Play each clip from start to finish, checking for dropped frames, audio sync issues, or visual artifacts. Address any problems immediately, as re‑capturing may be more difficult if the tape has already been handled extensively.