Dji Mini 3 Shi Yong Zhe Shou Ce: An In‑Depth Overview
The Dji Mini 3 has quickly become a favorite among hobbyists and professionals who need a lightweight, portable aerial platform. The user manual, or Shi Yong Zhe Shou Ce, is more than a collection of technical specifications; it is a practical guide that helps pilots unlock the drone’s full potential while staying safe and compliant with local regulations. This article walks you through the most important sections of the manual, offering clear explanations and actionable tips for both first‑time owners and seasoned flyers.
1. Getting Started with the Mini 3
Unpacking and Initial Setup
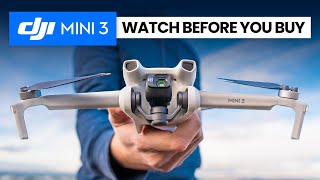
When you open the box, you will find the Mini 3 aircraft, a remote controller, a set of propellers, a charging cable, and a quick‑start guide. The manual advises you to inspect each component for damage before proceeding. After confirming everything is intact, attach the propellers according to the clockwise and counter‑clockwise markings – a simple step that prevents motor reversal during flight.
Next, charge the battery using the supplied USB‑C cable. The manual recommends a full charge of at least two hours before the first flight. Once the battery is fully charged, insert it into the drone’s compartment, ensuring the contacts align correctly.
2. Pre‑Flight Checklist
Essential Safety Checks
Before every flight, the manual outlines a concise pre‑flight checklist:
- Verify that the firmware on both the drone and the remote controller is up to date.
- Confirm GPS signal strength; the Mini 3 requires at least four satellite connections for stable positioning.
- Calibrate the compass if you are in a new location or after a significant magnetic disturbance.
- Check that the propellers are securely fastened and free of cracks.
- Ensure the flight area is clear of obstacles, people, and restricted airspace.
Following these steps reduces the risk of unexpected loss of control and helps you comply with local aviation regulations.
3. Basic Controls and Flight Modes
Understanding the Remote Controller
The Mini 3 remote features two joysticks, a mode switch, and several shortcut buttons. The left joystick controls altitude and yaw (rotation), while the right joystick manages forward/backward and left/right movement. The mode switch toggles between P‑Mode (Positioning) for beginner pilots and F‑Mode (Sport) for experienced users who need faster response times.
Key Flight Modes
- QuickShot: Automated cinematic sequences such as Dronie, Circle, and Rocket.
- ActiveTrack: The drone locks onto a moving subject and follows it while keeping the camera centered.
- Panorama: Capture wide‑angle images by stitching multiple shots together.
- Tripod: A low‑speed mode that provides smooth, precise movements for indoor or close‑up shots.
Each mode is described in detail in the manual, along with recommended settings for optimal performance.
4. Camera Settings and Photo/Video Tips
Resolution and Frame Rate Choices
The Mini 3 supports 4K video at 30 fps, 1080p at 60 fps, and 720p at 120 fps for slow‑motion capture. For still photography, the sensor can produce 12‑megapixel JPEGs or RAW files. The manual advises selecting the highest resolution only when you have sufficient storage and battery life; otherwise, a lower resolution can extend flight time.
Exposure Controls
While the drone automatically adjusts exposure in most situations, the manual explains how to manually set ISO, shutter speed, and white balance for creative control. For example, a lower ISO (100–200) reduces noise in bright daylight, whereas a higher ISO (800–1600) may be necessary in low‑light environments, albeit with increased grain.
5. Safety and Legal Considerations
Regulatory Compliance
In many countries, drones under 250 grams, such as the Mini 3, are exempt from certain registration requirements. However, the manual stresses that pilots must still respect local airspace restrictions, maintain a line of sight, and avoid flying over crowds or private property without permission.
Emergency Procedures
If the drone loses GPS signal, the manual instructs you to engage the “Return‑to‑Home” (RTH) function, which automatically guides the aircraft back to its take‑off point using the stored home coordinates. In the event of a battery warning, you should land promptly in a safe area to prevent a forced crash