Understanding the Mini Cooper Receiver Hitch
The Mini Cooper, known for its compact size and spirited handling, can also be equipped to tow light loads when a receiver hitch is installed. A receiver hitch is a steel frame that bolts to the vehicle’s rear chassis, providing a standardized mounting point for tow bars, bike racks, cargo carriers, and other accessories. For Mini Cooper owners, selecting the right hitch means balancing load capacity, fitment, and preserving the car’s handling characteristics.
Why Install a Receiver Hitch on a Mini Cooper?
Even though the Mini Cooper is not a traditional workhorse, many drivers appreciate the flexibility a hitch offers. Common reasons include:
- Transporting a small trailer for weekend getaways.
- Mounting a bike rack to carry bicycles on road trips.
- Adding a cargo carrier for extra luggage without sacrificing interior space.
- Enabling a tow bar for a compact utility trailer or a small boat trailer.
When properly installed, a hitch can expand the Mini’s utility without compromising safety, provided the vehicle’s Gross Vehicle Weight Rating (GVWR) is not exceeded.
Choosing the Right Hitch for Your Mini Cooper
Mini Cooper models from the first generation (2000‑2006) through the latest fourth generation (2022‑present) share similar rear‑frame designs, but there are subtle differences in bolt patterns and load ratings. Consider the following factors:
- Vehicle Year and Model: Verify that the hitch you select lists compatibility with your specific Mini Cooper year and trim. Some hitches are engineered for the hatchback, while others are tailored for the convertible.
- Receiver Size: The most common size for Mini Coopers is a 1‑inch receiver, which accommodates the majority of bike racks and cargo carriers. A 2‑inch receiver is optional for heavier towing applications, though it may be over‑spec for most Mini owners.
- Load Capacity: Look for a hitch rated for at least 1,500 lb of tongue weight and 2,000 lb of total trailer weight. This rating comfortably covers the typical loads Mini drivers intend to haul.
- Material and Finish: High‑strength steel with a corrosion‑resistant coating (such as powder‑coat or chrome) ensures durability and matches the Mini’s aesthetic.
Recommended Brands and Models
Several manufacturers produce hitches that fit the Mini Cooper’s rear chassis. While the market offers many options, a few brands have earned a reputation for quality and ease of installation:
- EcoHitch: Known for a bolt‑on design that integrates seamlessly with the vehicle’s frame, offering a clean look and solid load rating.
- CURT: Provides a range of Mini‑specific hitches with clear fitment instructions and a reputation for reliable performance.
- Mini OEM‑Style: Some aftermarket suppliers replicate the original equipment manufacturer (OEM) style, preserving the Mini’s visual lines while adding hitch functionality.
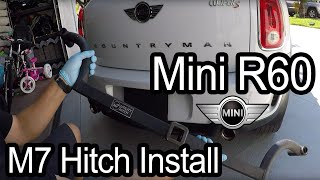
Installation Overview
Installing a receiver hitch on a Mini Cooper is a straightforward process for those comfortable with basic hand tools, but it does require careful attention to torque specifications and alignment. Below is a step‑by‑step guide to give you an idea of what to expect.
Tools and Materials Needed
- Socket set with extension bar
- Torque wrench (recommended for precise bolt tightening)
- Jack and jack stands
- Protective gloves and eye safety gear
- Thread‑locking compound (optional)
Step‑by‑Step Installation
- Prepare the Vehicle: Park the Mini on a level surface, engage the parking brake, and disconnect the negative battery terminal to prevent any electrical interference.
- Lift the Rear End: Use a floor jack to raise the rear of the car, then secure it on jack stands. Remove the rear wheel to gain access to the mounting area.
- Remove the Stock Bracket: Many Mini Coopers have a factory‑installed rear bracket for the spare tire. Unbolt this bracket, taking note of any fasteners that will be reused for the hitch.
- Position the Hitch: Align the hitch’s mounting plate with the existing bolt holes. Some hitches include a spacer plate to ensure proper fitment.
- Secure the Hitch: Insert the bolts and tighten them by hand, then use a torque wrench to apply the manufacturer‑specified torque (typically around 80–90 lb‑ft). Apply thread‑locking compound if recommended.
- Reinstall the Wheel: Place the wheel back on, lower the vehicle, and torque the lug nuts to the proper specification (usually 100 lb‑ft for Mini Coopers).
- Final Checks: Verify that the hitch sits flush against the chassis and that there is no movement. Reconnect the battery and test any attached accessories.
While the installation can be completed in a few hours, many owners prefer to have the hitch installed by a professional to ensure correct torque and alignment