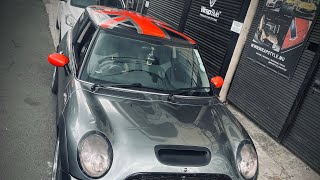
Mini Cooper with British Flag: A Stylish Tribute to the Union Jack
The Mini Cooper has long been celebrated as one of the most recognizable cars in the world. Its compact silhouette, iconic round headlights, and playful personality make it a favorite among enthusiasts and city drivers alike. Adding a British flag wrap—commonly known as the Union Jack roof graphic—takes this classic model to a new level of patriotic flair. Whether you own a classic Mini, a modern Mini Hatch, or a brand‑new Mini Cooper, a Union Jack roof transformation offers a bold statement while preserving the car’s timeless charm.
Why Choose a Union Jack Roof for Your Mini?
There are several compelling reasons why Mini owners opt for a British flag wrap:
- Instant Visual Impact: The Union Jack’s red, white, and blue colors create a striking contrast against the Mini’s typically black or silver bodywork.
- Easy Reversibility: Unlike a permanent paint job, a high‑quality vinyl wrap can be removed without damaging the original paint, preserving resale value.
- Personal Expression: Whether you’re a proud Briton, a fan of British pop culture, or simply appreciate the design, the flag wrap showcases your identity on the road.
- Protection: Vinyl wraps add a protective layer that guards the roof from UV rays, minor scratches, and environmental contaminants.
Preparing for the Installation: Masking and Taping
Before the Union Jack graphic is applied, careful preparation ensures a flawless finish. Professional installers at Wrapstyle follow a systematic approach:
- Cleaning the Surface: The roof is washed with a dedicated automotive cleaner to remove dust, wax, and oils.
- Masking the Edges: High‑tack masking tape is placed along the roof’s perimeter, door frames, and any protruding elements to protect them from the adhesive.
- Temperature Check: Installation is performed in a controlled environment, typically between 20°C and 25°C (68°F–77°F), to guarantee optimal vinyl adhesion.
- Dry Fit: The Union Jack sheet is laid out on the roof to confirm alignment and coverage before any adhesive is applied.
Step‑by‑Step Guide to Installing the Union Jack Roof Graphic
Below is a concise overview of the installation process used by Wrapstyle for a brand‑new look on the Mini Cooper:
- Positioning: The Union Jack vinyl is positioned so that the central cross aligns perfectly with the Mini’s roof centerline.
- Adhesive Activation: The backing paper is peeled back gradually, allowing the adhesive to contact the roof while a squeegee smooths out air bubbles.
- Heat Application: A low‑temperature heat gun is used to activate the adhesive, especially around curves and seams, ensuring the graphic adheres tightly.
- Trimming: Excess vinyl is trimmed with a precision blade, leaving a clean edge that matches the