Curated coverage and comprehensive guides by Fresh Picks.
MrCool Mini Split Installation: A Step-by-Step Guide
So you just purchased your new MrCool Mini Split and are thinking about the installation process. Congratulations on choosing a reliable and efficient HVAC solution! In this article, we'll provide a comprehensive step-by-step guide on how to install your MrCool Mini Split, helping you to save time and money.
Pre-Installation Checklist
Before starting the installation, make sure you have:
* A MrCool Mini Split unit (check the packaging for any damage)
* The necessary tools and materials, including:
+ A drill and bits
+ A level
+ A wrench and socket set
+ Refrigerant lines and fittings
+ Electrical connectors and wiring
* A clear understanding of local building codes and regulations
Understanding the MrCool Mini Split System
The MrCool Mini Split system consists of two main components: the indoor unit and the outdoor unit. The indoor unit is responsible for blowing conditioned air into the room, while the outdoor unit houses the compressor and condenser coil.
Step-by-Step Installation Guide
### Step 1: Choose the Installation Location
Select a suitable location for the indoor and outdoor units. The indoor unit should be installed at least 7 feet above the floor, and the outdoor unit should be installed in a well-ventilated area, away from direct sunlight and moisture.
### Step 2: Mount the Indoor Unit
Use a level to ensure the indoor unit is properly aligned, then mark the screw holes on the wall. Drill the holes and insert the screws, making sure they are securely fastened. Hang the indoor unit on the wall, following the manufacturer's instructions.
### Step 3: Install the Outdoor Unit
Place the outdoor unit on a level surface, ensuring it is securely fastened to the ground or a concrete pad. Connect the refrigerant lines to the outdoor unit, following the manufacturer's instructions.
### Step 4: Connect the Refrigerant Lines
Connect the refrigerant lines to the indoor and outdoor units, ensuring they are securely fastened and sealed. Use a vacuum pump to evacuate the lines and remove any air or moisture.
### Step5: Electrical Connections
Connect the electrical wiring to the indoor and outdoor units, following local electrical codes and regulations. Make sure all connections are secure and meet the manufacturer's requirements.
### Step 6: Test the System
Turn on the system and test it to ensure it is working properly. Check for any leaks, and verify that the system is cooling or heating as expected.
DIY Considerations
If you're a DIY enthusiast, you may be wondering if you can install the MrCool Mini Split yourself. While it's possible to install the system yourself, it's essential to consider the following:
* You must have experience with HVAC installations and electrical work
* You must follow local building codes and regulations
* You must ensure the system is properly sized for your space
If you're not comfortable with the installation process, consider hiring a professional HVAC technician.
Benefits of MrCool Mini Split
The MrCool Mini Split offers several benefits, including:
* High efficiency and energy savings
* Quiet operation
* Easy installation and maintenance
* Affordable price point
Conclusion
Installing a MrCool Mini Split is a straightforward process that requires careful planning and attention to detail. By following this step-by-step guide, you can ensure a successful installation and enjoy the benefits of your new HVAC system. For more information on MrCool Mini Split systems, visit .
Maintenance and Troubleshooting
Now that it's been a year since you installed your MrCool Mini Split, it's essential to perform regular maintenance to ensure optimal performance. Check the air filter regularly, and clean or replace it as needed. Also, inspect the outdoor unit for any debris or blockages.
If you encounter any issues with your MrCool Mini Split, refer to the troubleshooting guide on the manufacturer's website or contact a professional HVAC technician for assistance.
Regularly check and clean the air filter
Inspect the outdoor unit for debris or blockages
Refer to the troubleshooting guide for assistance
By following these tips and guidelines, you can enjoy years of reliable and efficient performance from your MrCool Mini
Relevant Guides
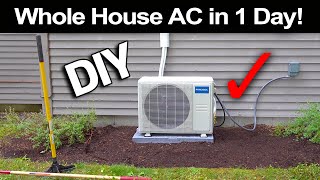
How to Install a Mr Cool 18,000 BTU AC in Just 1 Day!
How to
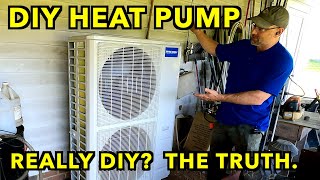
MRCOOL DIY® Installation Guide
So you just purchased your new
Installing Mr Cool 18K Mini-Split (DIY Guide)
Thinking about
Complete Mr Cool Mini Split DIY installation
Step by Step guide to
Complete DIY Mini Split Installation | New Mr Cool 4th Gen Unit
Mr Cool Mini Split
DIY Mini Split Install: Mr. Cool, Multi Zone System.
https://mrcooldiy.com/. I
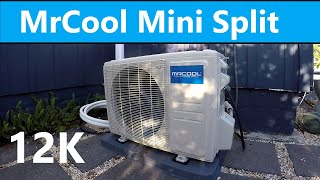
How to Install a Mr Cool 12K BTU AC Mini Split
DIY
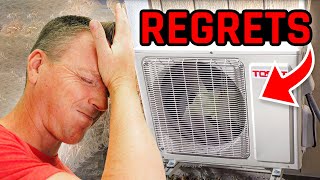
DIY Mini Split Install: 3 Regrets After 1 Year of Use
Now that it's been a year since I
Pro Level Mr Cool DIY Install in less than 1 day!
#lowesPartner #lowesFinds @lowes
Mr Cool DIY 5-Year REVIEW: Total Regret? | Honest Take
THANKS FOR WATCHING:
How to Install the MrCool DIY Multi Zone
Installation
DIY Mini Split Install - All the Things Nobody Shows You
Installing
MRCOOL DIY Ceiling Cassette Install – Step-by-Step Install Guide (5th Gen Multi-Zone & Single Zone)