Replacement Screen for iPad Mini 2: What You Need to Know
The iPad Mini 2 remains a popular choice for users who value a compact tablet with solid performance. However, like any touchscreen device, its display is vulnerable to cracks, dead pixels, and backlight failures. When the original screen can no longer deliver a clear, responsive experience, a replacement screen becomes the most practical solution.
Why a Screen Replacement Is Often the Best Option
Replacing the screen restores the iPad Mini 2 to its original visual quality without the expense of buying a new device. A functional screen is essential for:
- Accurate color reproduction for reading, streaming, and photo editing.
- Responsive touch input, which is critical for navigation and typing.
- Maintaining resale value if you plan to sell or trade in the tablet later.
Common Signs That the Screen Needs Replacement
Before deciding on a replacement, check for these symptoms:
- Cracks or Shattered Glass – Even minor cracks can spread and affect touch sensitivity.
- Discolored or Flickering Display – Spots of black, white, or rainbow colors often indicate a failing backlight.
- Unresponsive Touch Areas – When certain parts of the screen do not register taps or swipes.
- Dead Pixels – Small clusters of pixels that remain permanently black or white.
- Separation Between Glass and LCD – A visible gap can cause moisture ingress and further damage.
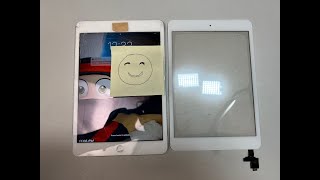
Choosing the Right Replacement Screen
Not all screens are created equal. Here are the key factors to consider when selecting a replacement for your iPad Mini 2:
- Original Equipment Manufacturer (OEM) vs. Third‑Party – OEM screens match the exact specifications of the factory part, while reputable third‑party options can be more affordable without sacrificing quality.
- Resolution and Color Accuracy – The iPad Mini 2 features a 2048 × 1536 Retina display. Ensure the replacement maintains this resolution and offers a wide color gamut.
- Touch Layer Compatibility – The digitizer must align perfectly with the LCD to preserve multi‑touch functionality.
- Warranty and Return Policy – A minimum 90‑day warranty protects you against early failures.
DIY Replacement vs. Professional Service
Both approaches have advantages. DIY replacement can save money, but it requires patience and the right tools. Professional repair services provide expertise and often include a warranty on the workmanship.
When to DIY:
- You have steady hands and experience with small electronics.
- You own or can obtain a precision screwdriver set, suction cup, and plastic spudger.
- You are comfortable working with delicate cables and adhesive strips.
When to Choose a Professional:
- The screen is severely damaged, making removal risky.
- You lack the necessary tools or workspace.
- You prefer a guaranteed result and quicker turnaround.
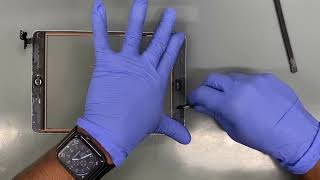
Step‑by‑Step Guide for a DIY Screen Replacement
If you decide to replace the screen yourself, follow these steps carefully:
- Power Down and Disconnect – Turn off the iPad and unplug any accessories.
- Remove the Bottom Screws – Use a pentalobe screwdriver to take out the two screws near the charging port.
- Separate the Display Assembly – Apply a suction cup near the top edge, gently lift, and insert a plastic spudger to pry the adhesive apart. Work slowly to avoid cracking the LCD.
- Detach the Digitizer Cable – Once the assembly is lifted, locate the metal shield covering the flex cable, lift it, and unplug the connector.
- Transfer Components – If the replacement screen does not include the front camera, speaker, or home button, carefully move these parts from the old assembly to the new one.
- Reconnect the New Screen – Align the digitizer cable, press the connector back into place, and re‑apply the adhesive strips.
- Seal the Device – Press the display firmly against the frame, replace the bottom screws, and power the iPad to test functionality.
After the device powers on, check for any dead pixels, touch lag, or color irregularities. If everything works, you have successfully completed the replacement.
Cost Considerations
The price of a replacement screen varies by source:
- OEM screens typically range from $120 to $150 plus shipping.
- High‑quality third‑party screens can be found for $70 to $100.
- Professional repair services often charge a labor fee of $80 to $120, in addition to the part cost.
Factor in the value of your time and the risk of damaging


![iPad mini 2 - touch replacement [4K]](https://i.ytimg.com/vi/BOk5O1ysuhI/mqdefault.jpg)