Setting Up HomePod mini: A Complete Guide
Apple’s HomePod mini brings high‑quality sound and smart‑home control to any room, but the experience starts with a smooth setup. Whether you’re a first‑time Apple user or adding a second speaker to an existing ecosystem, this guide walks you through every step—from unboxing to customizing Siri preferences—so you can start using your HomePod mini right away.
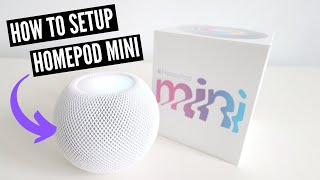
What’s Inside the Box
Before you begin, verify that you have all the essential items. The HomePod mini package includes:
- The HomePod mini unit
- A power adapter and USB‑C cable
- Quick‑start guide (optional)
There are no additional accessories required; the speaker powers directly from a standard wall outlet.
Preparing Your iPhone, iPad, or Mac
The HomePod mini relies on an Apple device running iOS 16, iPadOS 16, or macOS 13 or later. Make sure your device meets the following criteria:
- Bluetooth is turned on.
- Wi‑Fi is enabled and connected to the network you want the HomePod mini to use.
- You are signed in to iCloud with the same Apple ID you plan to use for HomeKit.
If you have multiple Apple IDs, sign out of the secondary accounts to avoid confusion during the pairing process.
Connecting the HomePod mini to Power
Plug the USB‑C cable into the HomePod mini’s port and connect the adapter to a wall outlet. The top of the speaker will light up with a pulsing white glow, indicating that the device is ready for setup.
Initiating the Setup Process
When the HomePod mini is powered on, a pop‑up will appear on your iPhone or iPad automatically. If it does not, follow these steps:
- Open the Home app on your iOS or iPadOS device.
- Tap the + icon in the upper‑right corner and select “Add Accessory.”
- Hold your device near the HomePod mini; the speaker will display a unique setup code on its surface.
- Confirm the code on your device and tap “Next.”
- Choose the room where you want the HomePod mini to reside. This helps Siri understand context for voice commands.
Connecting to Your Wi‑Fi Network
The HomePod mini uses your iPhone’s Wi‑Fi connection to join the same network automatically. During setup, you’ll see a progress bar as the speaker syncs with your router. If your network requires a password, ensure it is entered correctly on your iOS device; the HomePod mini does not have a manual entry option.
Customizing Siri and Audio Settings
Once the HomePod mini is online, you can fine‑tune its behavior:
- Personal Requests: Enable this feature to let Siri access your messages, reminders, and calendar when you speak the wake phrase.
- Intercom: Turn on Intercom to broadcast messages to other HomePod speakers in your home.
- Sound Check: Activate Sound Check for consistent volume across different tracks.
- Room Acoustics: The speaker automatically adjusts bass and treble based on its placement, but you can override these settings in the Home app under “Audio Settings.”
Integrating with HomeKit Accessories
With the HomePod mini as a HomeKit hub, you can control lights, thermostats, locks, and more using voice commands. To add a new accessory:
- Open the Home app and tap the + icon.
- Select “Add Accessory” and scan the QR code on the device or follow the manufacturer’s pairing instructions.
- Assign the accessory to a room and give it a recognizable name.
After the accessory is linked, you can say, “Hey Siri, turn on the living‑room lights,” and the HomePod mini will relay the command to the HomeKit bridge.
Troubleshooting Common Issues
If the HomePod mini fails to appear in the setup screen, try these steps:
- Restart your iPhone or iPad and ensure Bluetooth and Wi‑Fi are active.
- Reset the HomePod mini by unplugging it, waiting ten seconds, and plugging it back in. The white light should flash rapidly, indicating a reset.
- Check that your router’s firewall isn’t blocking Apple’s ports (80, 443, and 5353 for mDNS).
- Make sure you are using the latest software version on both the HomePod mini and your iOS device.
Enjoying Your New Smart Speaker
After setup, the HomePod mini is ready to stream music from Apple Music, podcasts, or any AirPlay‑compatible app. Simply say, “Hey